Saturday, July 24, 2010

Date Night Delicacy

When I think of romantic date-worthy food, my mind automatically turns to France. Maybe it has something to do with the fact that I was proposed to in one of the most romantic cities on the planet - Paris - right beneath on of the most romantic icons in the world - the Eiffel Tower - (Tom Cruise and Katie Holmes have got nothin' on me), but I like to think it's something more. After all, what's more romantic than a candlelit dinner at a sidewalk cafe with a nice bottle of wine? And while this type of dinner can be romantic anywhere in the world, the French have truly perfected it.

For those of us who can't afford to jet over to France for an evening meal, I provide the following recipe for French-style scallops in white wine and butter sauce with capellini. This is such a great date night meal. It literally takes less than 10 minutes to make, but it tastes so decadent and rich that your date will think you spent hours slaving away on it. Don't worry, your secret is safe with me.

Scallop Capellini with White Wine Butter Sauce

1/2 lb (1/2 box) capellini pasta
1 lb fresh scallops (avoid frozen or previously frozen scallops)
salt and pepper (for seasoning)
all purpose flour (for dredging)
1/2 stick of unsalted butter, divided in half
3 large shallots, finely chopped
2 cloves garlic, minced
1/2 bunch of parsley, chopped
1/3 cup white wine
fresh lemon juice


De Cecco = Delicious. Plus, capellini only takes 2 minutes to cook (no joke).


Chop scallops in half and season with salt and pepper.


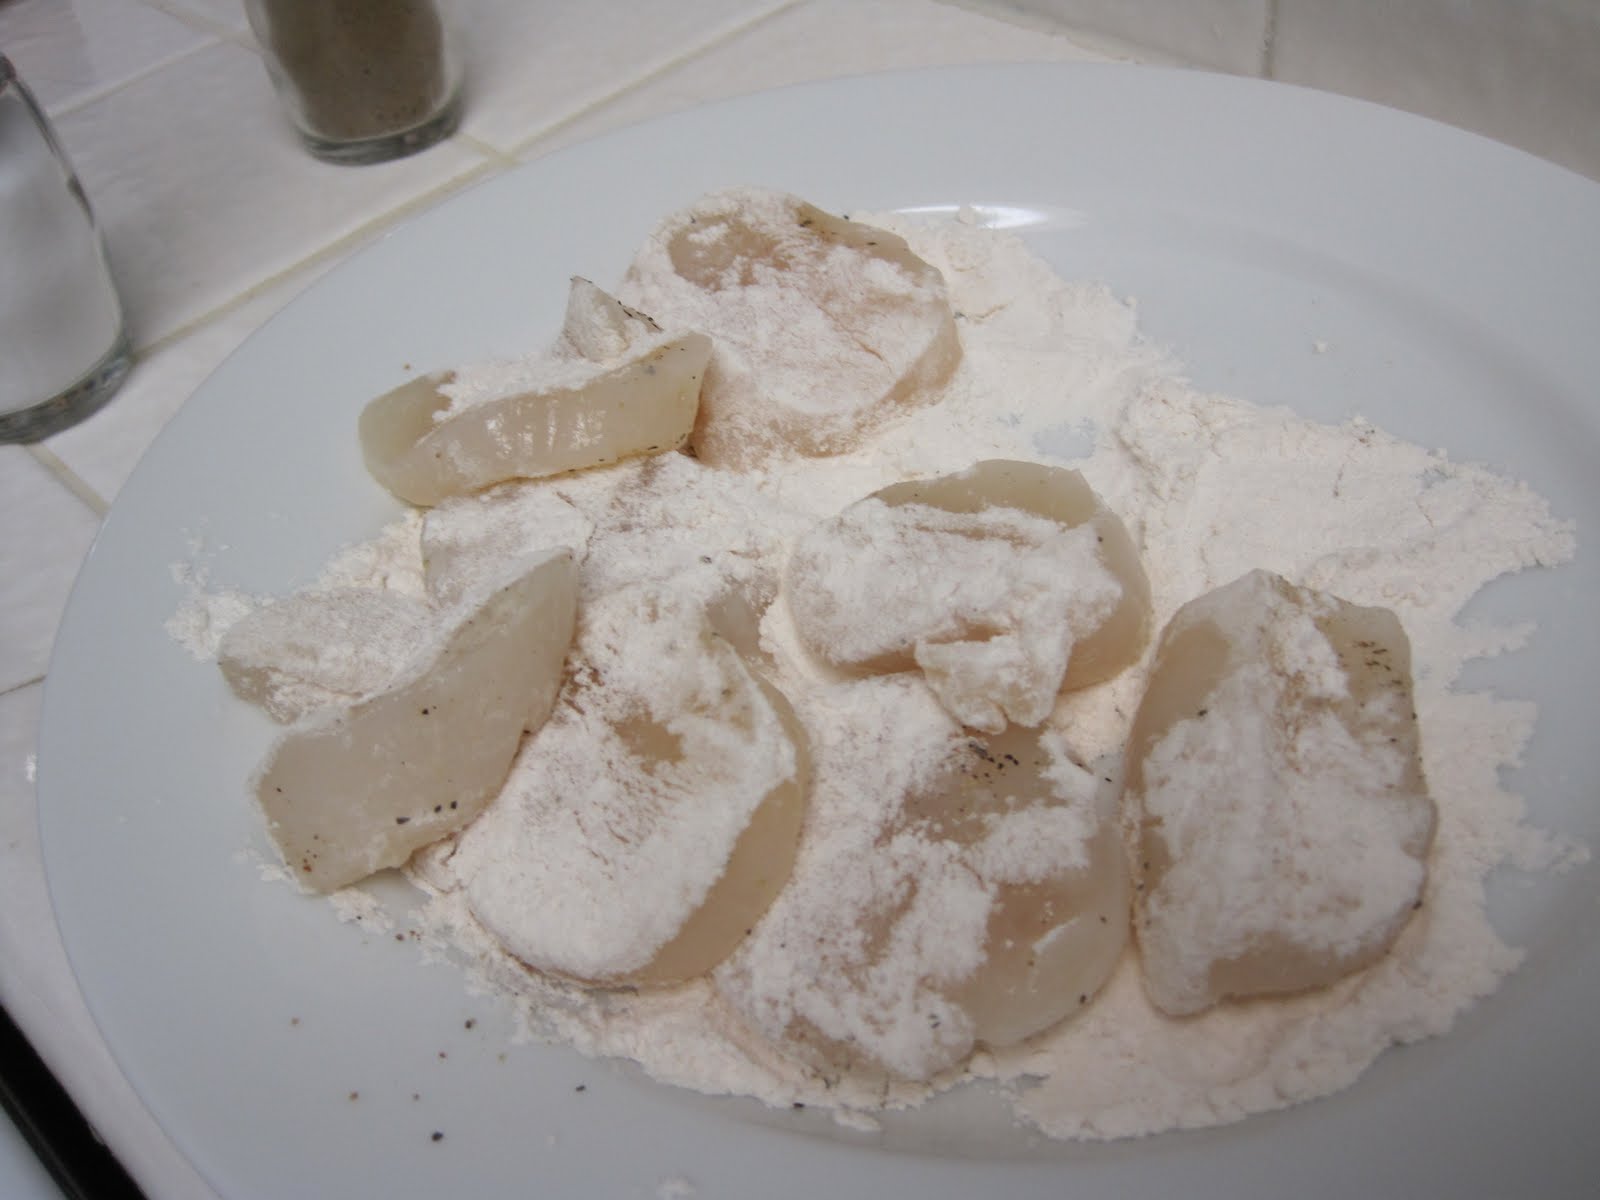
Dredge in flour.


Turn to coat both sides with flour.


Place scallops in hot pan with 1/4 stick (1/2 of total amount required for recipe) melted butter over medium-high heat. No matter how tempted you may be, DO NOT under any circumstances touch or turn the scallops for at least 2 minutes.


After two minutes, flip the scallops over. They will have this lovely golden brown crust. Cook for another two minutes on the previously uncooked side, then remove the scallops from the pan.


Melt the remaining 1/4 stick of butter and add parsley, shallots, and garlic. Saute for 2 minutes.


Add white wine and return scallops to pan so that all of the flavors can meld together. Cook for two minutes, then add several squirts of fresh lemon juice just before serving.


Plate the pasta. Top with scallops.


Pour sauce over pasta, then toss to coat evenly.


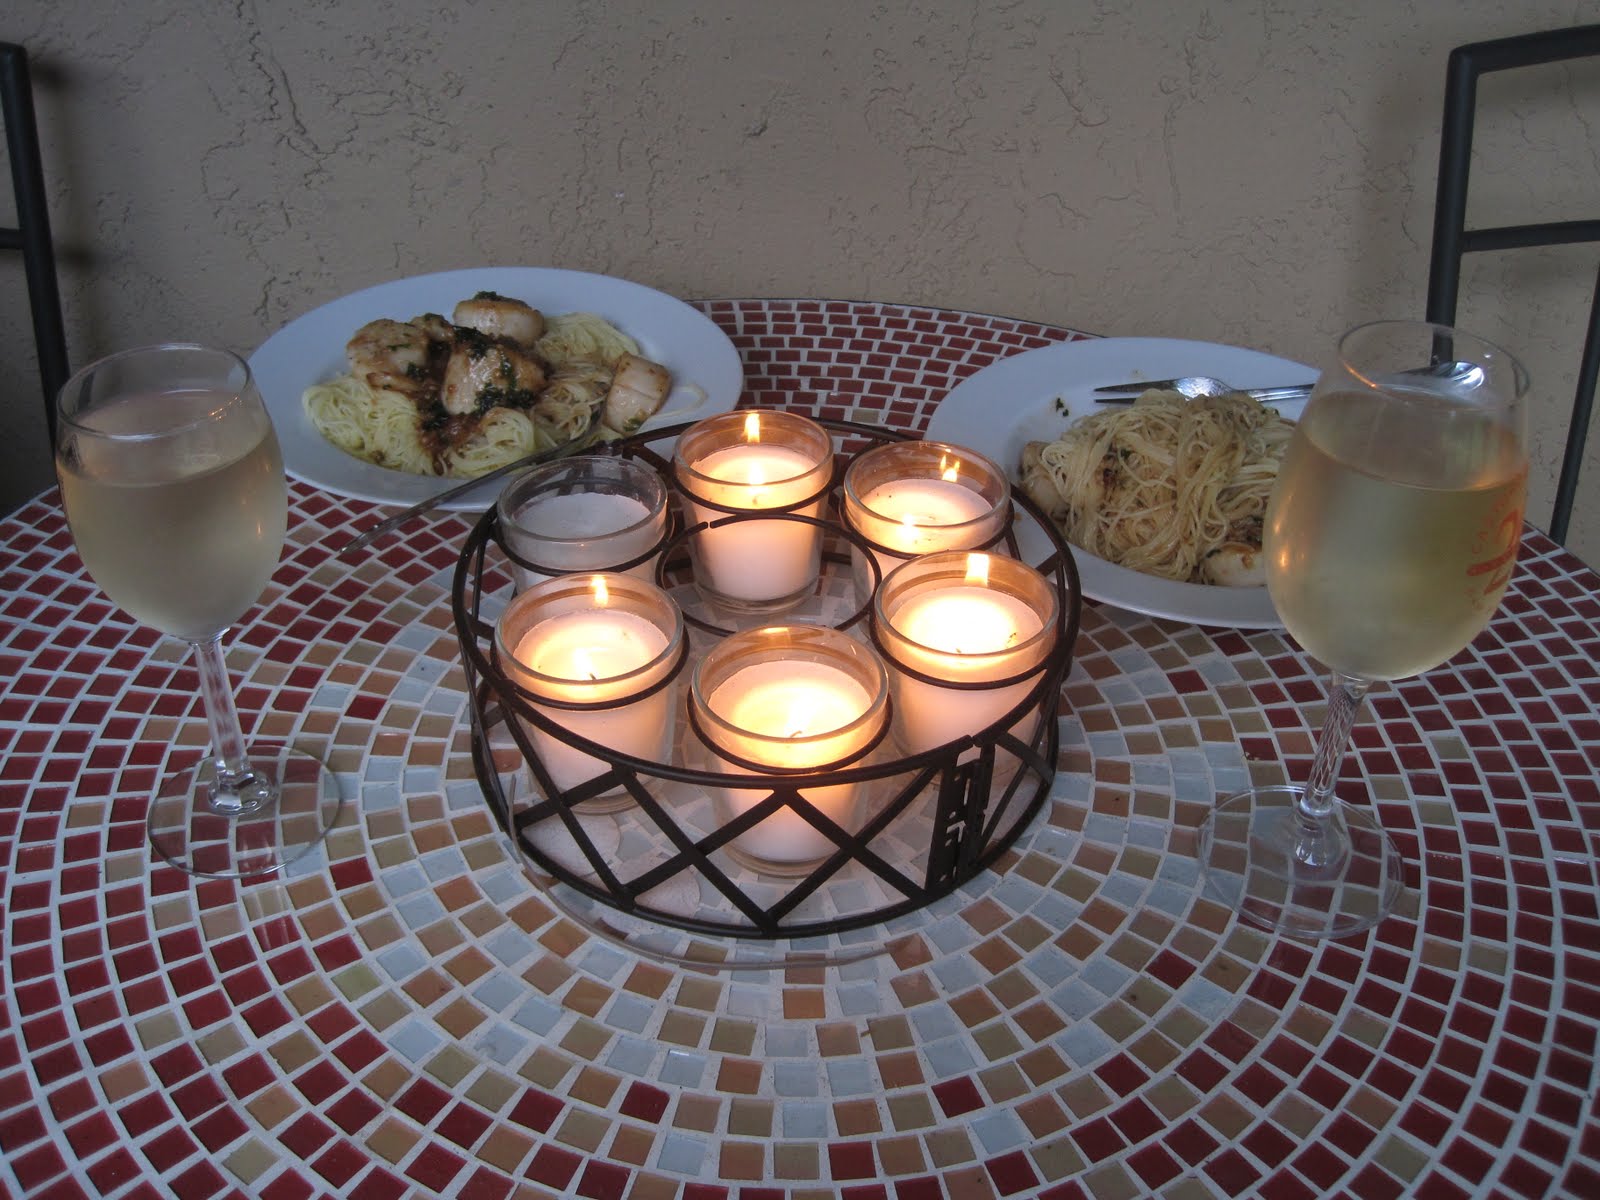
Serve al fresco with the wine you used in the recipe (and, of course, candlelight).

Monday, July 19, 2010

Dog Beach

One of my favorite things about San Diego (and the thing I missed the most while living in the mountains) is the beach. If I could, I would go to the beach each and every day. I love the beach when it's stormy, when it's sunny, when it's cloudy, when it's hot, when it's cold - you get the idea. There is just something so soothing about the sound of the waves and the smell of the salty breeze.

There are so many things that I love to do that I don't get to share with my dogs, but luckily the beach is not one of them since there are at least 4 different dog beaches around San Diego that I know of. Taking the dogs to the beach is quite the undertaking though, so I have only made it to one of the dog beaches so far - the one in Del Mar near the fairgrounds (which also conveniently happens to be the one closest to my house).

When I first took the dogs to the beach, I was worried that they would be afraid of the ocean. Tenaya is a total water dog and has always loved swimming in lakes and rivers and streams any chance that she gets, even when she was just a tiny puppy. Charlie, on the other hand, is a total weirdo around water. (I was actually convinced for almost a year that he just wasn't able to swim at all because he never went in to water any higher than his knees. Then one day, he was chasing a dog at the Sunnyside dog park in SLC like a bat out of hell. The dog went leaping into the lake and Charlie followed full steam ahead. I thought that was the end of Charlie and he would surely drown, but he shocked me by swimming across the entire lake like he had been swimming his whole life. That dog never ceases to surprise me.)

Even though I knew the dogs could swim, I thought for sure that when they saw and heard the crashing waves they would be scared and not want to get anywhere near the water. Let's just say, I couldn't have been more wrong! They BOTH dove right in and now dog beach is probably their favorite place to go. Watching them play there is one of the cutest and funniest things that I have witnessed. Here are some photos I managed to snap on our most recent visit this weekend:


When Tenaya sees water, she has only one priority - fetch.


Super dog!


Charlie, on the other hand, is more interested in exploring and finding other dogs (or sea creatures) to play with.


This time he met another husky who wanted to be his girlfriend.


They were basically inseparable the entire time. It almost made me wish I had another husky for a second (until I imagined all of his craziness multiplied by two).

Tuesday, July 6, 2010

Happy 4th of July!

This year, the 4th of July marked one month at my new job. I was totally digging my new job and getting into a groove, when, of course, like clock work, things started to go wrong. Not just one thing. Oh no. That would be far too simple. One thing after another stopped working and I was (and still am) getting frustrated.

So as you may imagine, a 3-day weekend was just what this doctor ordered. I wish I could tell you that the weather was gorgeous and I went to the beach and partied and drowned my work sorrows in a weekend o' fun, but I would be lying. It is in the 60s here in La Jolla, it is windy, and rainy, and I haven't seen the sun in 4 days. And although the weather is not causing my work funk, it is definitely not helping it either.

Due to this weather rut, I spent most of my weekend indoors. Although this doesn't rank high on the excitement meter, it was very relaxing and I got to catch up on my Netflix queue, as well as some much needed rest. I also got to get back in the kitchen and try some new recipes. And really, what better excuse for mid-summer cooking is there than the 4th of July? I made my first attempt at homemade bbq sauce, as well as some patriotic desserts, and more than a few tasty beverages. If you live somewhere chilly like me, bake this salmon and warm up your kitchen. If you live somewhere warm, fire up your grill and try your hand at grilling this salmon. I promise that you won't regret it!


You can find this bbq sauce recipe here. As you can see from the number of ingredients required, it's kind of a kitchen sink approach, but it sure is tasty!

Here's what it looks like once you start boiling it in the pan. The brown sugar makes a nice glaze. It was great on salmon, but would go really well with red meat too.

I made this couscous to accompany the salmon. Pearled (or Israeli as it is also known) couscous is delicious and tastes heartier than regular couscous. Give it a try if you haven't already.

The finished product (not the most gorgeous plating, but you get the idea).

Paul enjoyed some boiler makers while I worked on the meal.

We tried to get Charlie in on the festivities.

To finish the meal, I made mini cheesecakes. The recipe is as follows:

Mini Cheesecakes

Crust:

6 honey graham crackers
1/8 stick of butter (1/4 cup)

Filling:

2 8-ounce package of cream cheese
1/2 cup light brown sugar
1/2 tsp vanilla extract
2 eggs + 2 egg yolks

Topping:

fresh berries (I used blackberries and raspberries, but blueberries would be nice too)

Preheat oven to 325 F. Coat 4 small pyrex custard cups with non-stick spray. Grind graham crackers (I used a mortar and pestle, but you could also crush them in a ziploc bag). Melt butter and toss with graham crackers in a small bowl. Place 3 Tbsp of the graham cracker and butter mixture in pyrex dishes. Press down with fingers to form loosely packed crust.

Graham crackers before . . . .

And after.

Mini crusts.

Beat cream cheese, sugar, and vanilla in a large bowl for about two minutes. Add eggs and yolks one at a time, blending well after each addition. Divide filling evenly between pyrex cups. Place cups in casserole dish and pour enough hot water in the casserole dish to reach halfway up the sides of the cups. (I know it's not easy to make out the water with the blue dish, but hopefully you can see it below.)

Bake for 45 minutes at 325 F. Remove cheesecakes from water bath immediately after baking and place on baking rack to cool completely.


After cooling, wrap each cheesecake in plastic wrap and chill in the fridge for at least 2 hours (up to overnight). Top with berries and serve.


My lame attempt at making a star.

Tuesday, June 15, 2010

Demystifying Tofu

When I first decided to stop eating all meat other than fish, I was positively frightened by tofu. I definitely did not grow up eating tofu (my dad is a tried and true steak and potatoes kind of guy) and although I had heard time and time again that tofu could be used as a healthier alternative to just about every protein on the planet, just how in the hell was I supposed to get from the flavorless white block I saw in the grocery store to a delicious meal?

The first tofu dish that I ever made was what I like to call chili and garlic tofu. I decided to go with a Chinese food-ish recipe (considering that tofu has been a prevalent ingredient in all different types of Asian cultures for centuries, I figured this was probably the best place to start). I found one that called for a whole host of different exotic veggies, but when I got to my local grocery store, I couldn't find most of them. So I bought the ones I did find and I ended up with a delicious recipe that I still enjoy to this very day, 8 years after my first foray into the wonders of cooking tofu.

(Side note: I know some people honestly cannot stand tofu, but don't shy away from this recipe - it also makes a wonderful marinade for chicken! You can whisk the ingredients together and marinate chicken breasts in them for 2 hours, then cook as you usually would.)

Chili and Garlic Tofu

2 Tbsp sesame oil
1 block extra firm tofu, cubed
6 cloves garlic, minced
1 bunch of green onions, diced
1 large jalapeno pepper, cored, seeded, and diced
(Be sure to remove the seeds and all of the white part of the jalapeno - otherwise the dish will be overly spicy!)
3 Tbsp low sodium soy sauce

Heat sesame oil over medium-high heat. Add tofu and saute for about 5 minutes, turning once (tofu should have a crispy, golden-brown color). Add garlic, green onions, and jalapeno and saute for 3 minutes. Add soy sauce and saute for 3 minutes. Serve over steamed rice.


Practicing my chopping skills for when I audition for Next Food Network Star. ;)

Cubed tofu (before it's transition into deliciousness).

Monday, June 14, 2010

Spa Cuisine

As much as I love cheesy snacks, no one should live on bar food alone. And with the NBA finals dragging on to game 6, I have been consuming more than my fair share of bar food and beer, so I was starting to crave something healthy.

Enter the following dish - it's light and healthy, but packs a ton of flavor. Baking the salmon cuts down on the extra fat you would get while frying the fish. And as an added bonus, it only requires 5 ingredients and 20 minutes to make. After eating it, you'll feel full without feeling weighed down. It's like going to a health spa, without the price tag and time commitment.

Baked Salmon with Lemon Olive Oil and Basil

2 salmon fillets
grapeseed oil
4 Tbsp extra virgin olive oil
juice from 1/2 lemon
chopped fresh basil

Heat oven to 350F. Brush salmon with grapeseed oil and season with salt and pepper. Bake salmon for 20 minutes. Whisk lemon juice and olive oil together in a small bowl. Drizzle salmon fillets with lemon-oil and sprinkle with chopped basil. Serve with couscous (the brand and flavor pictured below pairs really nicely with this salmon recipe).

Friday, June 11, 2010

Game Day Goodies

As much as you all know this girl loves to watch her sports in a bar, not getting a paycheck for a month and a half has put a damper on going out to eat/drink/be merry. So when game 4 of the NBA finals rolled around, I decided to whip up some bar food of my own at home. Bust out the cheese and the bacon - we're making Irish Nachos!

My sister introduced me to this tasty treat not long ago and I quickly became hooked (what's not to love about potatoes, bacon, and cheese?). In doing an internet search for Irish Nachos, I discovered that a bar in Arlington, TX called J. Gilligan's Bar and Grill is credited with inventing this delicious dish. It seems there are a million different ways to make this dish, but basically, these are just nachos with potatoes used in place of the tortilla chips. I went with a more traditional version, but feel free to spice it up as you see fit! Oh and one more thing, GO LAKERS!

Irish Nachos

1 bag frozen potato wedges
1 cup grated sharp cheddar
1 cup grated mozzarella
2 strips bacon, crumbled (since I don't eat meat, I used veggie bacon, pictured below)
chopped chives (used as garnish)

Cook potato wedges according to instructions on package (either bake or fry - it does not make much of a difference). Sprinkle wedges with cheeses and crumble bacon on top. Scatter chives on top to garnish. Place under broiler at 450F for 5 minutes (or until cheese starts to bubble but has not started to brown yet). Serve with ketchup and sour cream and enjoy!


Fake Bacon! (Almost) as good as the real thing.

Friday, June 4, 2010

Work, Work, Work

Ok, so if you read my last post you know that I am back at work after several months of working primarily from home, traveling, or being off work completely (ah, the good life). I often hear people say that they are so bored staying home, they could never not have a job, etc etc. I am not going to lie to you - I have no idea what these people are talking about. I have so many hobbies, interests, and passions that have nothing to do with working, I feel like I could never work another day in my life and not ever be bored. But alas, I haven't won the lottery (yet), so I can't afford to be jobless. Maybe once I pay off those student loans . . .

But back to reality - I am neither independently wealthy nor out of debt, so I must work. Today marks the end of my first week at my new job, and I have to say, the job has been so far so good (knock on wood so that I don't completely jinx myself). My co-workers have been welcoming and helpful, I am working on something unrelated enough to my thesis that I am not bored but related enough to my strengths that I am not completely overwhelmed - all in all, a pretty good fit so far. But as you can probably imagine, there is one severe drawback to being back at work - the reduction of my precious free time by a minimum of 9 hours each day. And one of the first things to fall victim to my limited free time is cooking. Until I get into more of a groove, I am looking for simple, delicious meals that I can eat more than once a week (that's right folks, I said I would eat the same meal more than once in one week which, if you know me, is not at all my style).

Enter the casserole. It has been serving just this purpose for years and years now. It takes minimal prep time, you can throw ingredients together, you can make it as high or low class as you want, it doesn't have to be pretty or perfect, and then you can just throw the whole thing in the oven for 30 minutes and it will be hot and ready to eat. In essence, exactly what I am looking for these days. I chose mac and cheese because it's a great, classic comfort food, and it's super easy to make (even as far as casseroles go). There are tons of variations on a classic mac and cheese recipe, but what makes this one so delicious is the use of several different types of full-flavored cheeses. Thanks mac and cheese for saving the day for a tired cook once again!

Baked Macaroni and Cheese

7 Tbsp unsalted butter
1/4 cup plus 2 Tbsp all-purpose flour
4 cups non fat milk
1 1/2 tsp dry mustard powder
1/8 tsp cayenne
1 lb elbow macaroni
1 cup grated extra-sharp cheddar, 1 cup grated sharp cheddar, 1/2 cup grated emmentaler, 1/2 cup grated gruyere (12 ounces of cheese total)
1 1/3 cups grated Parmesan cheese (4 ounces)
1 cup panko (Japanese bread crumbs)

Preheat oven to 350F. Spray a 3 quart casserole dish with non stick spray.

Melt 6 Tbsp butter over medium-low heat in a small saucepan. Add flour and whisk for 3 minutes to form a roux (basically a french term for "thickening agent" - you can use roux to thicken up gravies, sauces, soups, or stews). Pour milk into saucepan and bring to a boil, whisking often (this takes awhile, so be sure to whisk so that you do not to allow this to burn). Add mustard powder, cayenne, and add salt and pepper to taste. Simmer until mixture thickens, whisking occasionally (2-3 minutes).

Meanwhile, cook the pasta and drain. Return to pasta pot and add sauce, and cheeses (saving 1/3 cup parm for topping), stirring to mix evenly:


Transfer to casserole dish. In a bowl, mix panko (pictured below) and 1/3 cup parm to form topping.

Sprinkle pasta in casserole dish evenly with panko/parm topping. Cut remaining 1 Tbsp of butter into small squares and distribute over topping, as pictured below:


Bake on middle oven rack for 30 minutes, until topping begins to brown. Serve and enjoy!