Saturday, January 28, 2012

Pumpkin Shrimp Curry


As you may know from some of my previous posts, I am an absolute fiend for pumpkin and am always looking for new ways to incorporate it into my recipes.  So you can imagine my excitement when I came across the 3 Chefs, 1 Ingredient feature in the November issue of Bon Appetit where they asked three different chefs to describe new ways to use pumpkin and proclaimed that "pumpkin is for more than just pie".  (I couldn't agree more!)  I promised you back in my Thanksgiving post that I would share my take on their suggestion for a Pumpkin Shrimp Curry and here I am finally getting around to it.  The next pumpkin recipe I plan to tackle is a pumpkin pasta, so all my fellow pumpkin fanatics out there should be sure to stay tuned!

Pumpkin Shrimp Curry

2 Tbsp olive oil
1 medium white onion, diced
1 Tbsp ginger
4 cloves of minced garlic
1 15 oz can of diced tomatoes
1 15 oz can of pumpkin
1 cup chicken (or vegetable) broth
1 can coconut milk
3 tsp curry powder
1 tsp cayenne pepper
1 lb peeled and deveined shrimp

Heat olive oil in a large skillet over medium heat.  Add onions and ginger.  Stir to coat onions with ginger and saute until onions are soft and translucent (about 8 to 10 minutes).


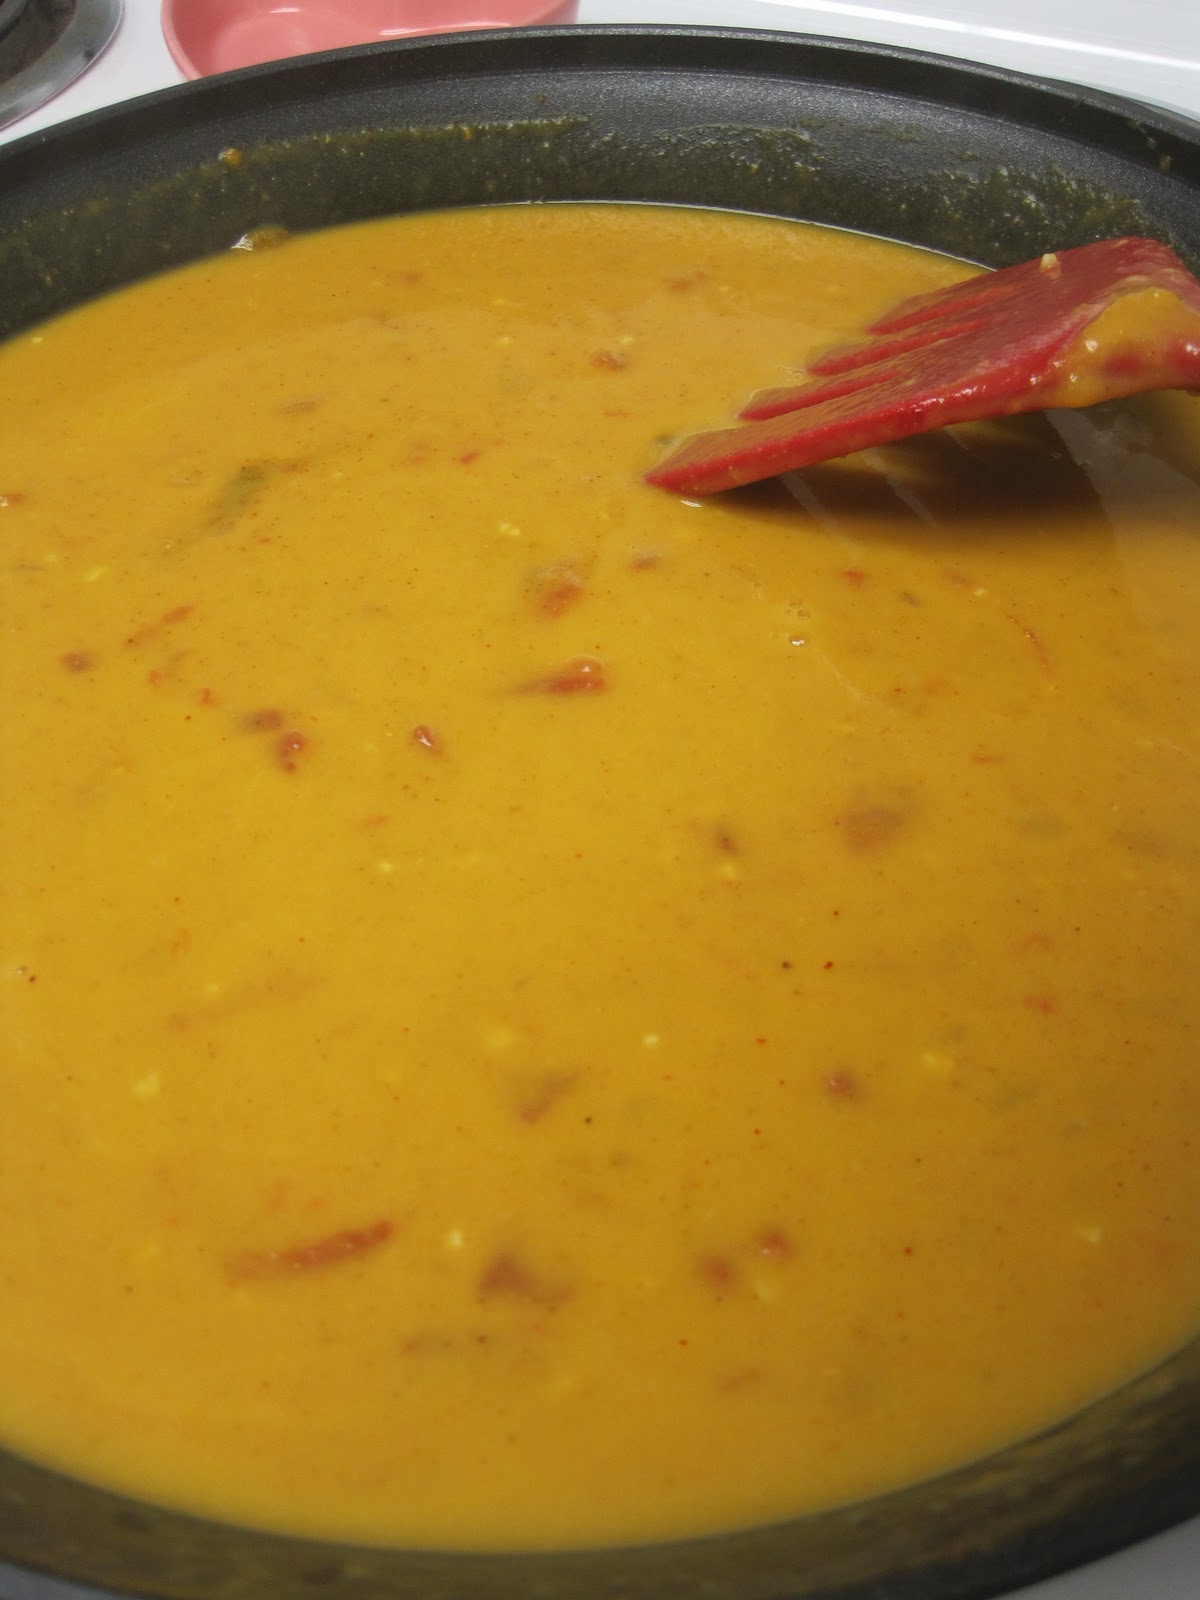
Add garlic and saute for another minute.  Add tomatoes (including any liquid from the can) and pumpkin and cook for 10 minutes.


Add broth, coconut milk, and both spices.  Stir to incorporate and simmer for 20 minutes.


I used light coconut milk.  All the flavor, creaminess, and richness of the regular version with only a third of the calories and fat - how can you go wrong?


Add the shrimp and simmer until they are cooked through.


Serve over steamed rice.  I garnished mine with cilantro and grated lime zest.

Sunday, January 22, 2012

Cookies! Om Nom Nom Nom


Instead of making the standard New Year's resolutions this year, Paul and I have decided to give up a different vice each month.  January's choice felt obvious to both of us after all of the overindulgence of the holiday season: no alcohol.  I have toyed with this idea every January for the past few years and I usually make it for about two weeks before having a drink.  I am happy to report that we have stuck with it this year (at least for the 22 days that have passed thus far).  I thought it was going to be really difficult, but I have to say that it has been fairly easy.

But there has been one unanticipated side effect of not drinking.  Against all odds, I am finding myself absolutely ravenous for sweets.  For years I have been the type of person who orders a cheese plate for dessert and skips the french toast at breakfast for the savory options.  But day after day I have found myself craving chocolaty treats.  And when I think of chocolaty comfort foods, the first thing that comes to mind is chocolate chip cookies.  Chocolate chip cookies were the first recipe I learned how to make on my own as a child, so they hold a special place in my heart.  These days, I make them taste a little more "grown up" by adding dark chocolate, sea salt, and walnuts to the batter instead of the ingredients I used a child, but the nostalgia remains just the same.  They sure do satisfy the cookie monster that I have become lately and I am sure that the cookie monsters in your neck of the woods will enjoy these too.  

Chocolate Chip Cookies

1 1/4 cups All-Purpose Flour
1/2 tsp sea salt
1/2 tsp baking soda
1 stick unsalted butter, melted
3/8 cup granulated sugar
3/8 cup light brown sugar
1 tsp vanilla extract
1 egg
1 cup bittersweet chocolate chips
1/2 cup chopped walnuts

Preheat oven to 375 F.

Mix dry ingredients (flour, sea salt, and baking soda) in a small mixing bowl:


In a large mixing bowl, melt butter in the microwave for about 1 minute on high:


Add granulated sugar, light brown sugar, and vanilla extract and stir to mix the ingredients together:


Add the egg and stir to incorporate:


Add the dry ingredients in two separate additions and mix well to incorporate after each addition:


Once you have added all of the flour, the batter should look something like this:


Add the chocolate chips and nuts and mix to incorporate:


Take two spoons and drop the dough by rounded spoonfuls onto a cookie sheet lined with a silicone baking mat (if you don't have a silicone mat, you can line the cookie sheet with parchment paper):


Bake the cookies for about 10 minutes, or until the edges start to brown.  Let the cookies rest on the cookie sheet for about a minute before transferring them to a wire baking rack to cool completely:


Sunday, January 1, 2012

I Took the BA Ribbon Cake Challenge


Happy New Year everyone!  I know that today is the day that people normally come up with their lists of resolutions for the year to come, but in this post I'd like to focus on a resolution that I made two years ago.  At the beginning of 2010 I vowed to make at least one recipe from Bon Appetit each month.  January flew by, then February, and I am sad to say that like so many New Year's resolutions that I have made over the years, I failed miserably at sticking to my plan.  Before I knew it, March had rolled around, and I still hadn't attempted to make a single recipe from the magazine (for a refresher about my progress, or perhaps more accurately lack thereof, see here). 

By the time the December issue found it's way into my mailbox, I had only successfully made two recipes from 2010 issues of the magazine (a far cry from the twelve I had aimed for, but better than nothing!).  But the moment that I laid eyes on that cover, I promised myself that I would make the amazing cake that graced it no matter how many months (or years) it took me to get around to it. 

Now I want you to understand, this cake is no ordinary cake.  This cake recipe is the one recipe that has been requested more often than any other recipe in the entire history of Bon Appetit magazine.  (The magazine calls it "The Ribbon Cake Challenge".)  It's a three layer chocolate cake, topped with a rum and chocolate buttercream frosting, topped with an espresso chocolate glaze, topped with chocolate ribbons.  All told, 7.5 sticks of butter and 3.5 pounds of chocolate go into this cake.  It is the ultimate cake.  (You can find the recipe here.) 

Once I had my heart set on making the cake, it was just a matter of when I would partake in an event that warranted such an extravagant and decadent cake.  Luckily, December 2011 presented me with the perfect reason - my mother-in-law's 70th birthday party.  What better time to indulge than when celebrating such an amazing milestone?

I am here to tell you that making this cake was not easy.  It took 2 days for me to complete this cake, thanks in no small part to help from my sous chef Paul.  Hands down, it was the most ambitious and difficult baking project that I have ever tackled.  But the result was well worth the effort.  Just maybe don't ask me to make it again until my 70th birthday. 

Here are some of the highlights from the process:


The cake with the buttercream frosting.


The ingredients for the glaze . . .


And the glaze itself.


Waiting for the glaze to set.


The cake once the glaze has set.


After adding the first set of white chocolate ribbons . . .


And topping the white chocolate ribbons with dark chocolate ones.


Bending the chocolate pieces that are to be used to form the bow . . .


And after adding the dark chocolate ribbons on top.


The finished product.